This post contains affiliate links. We earn commissions if you purchase products from retailers after clicking on a link from our site. As an Amazon Associate, we earn from qualifying purchases.
So, you want to record your own audiobook? It may feel like you just opened a whole new universe of information–there is a lot to know. I wanted to compile basically the one-stop guide for figuring out your equipment needs for recording your own audiobook.
In brief, I’ve listed what you absolutely need and what is optional for recording an audiobook.
- Necessary
- Noise-Free Recording Environment
- A Pop Filter
- A Microphone: XLR/USB/built-in
- Cables: XLR/USB
- Microphone Stand
- A Computer: Mac/PC
- Recording Software
- Optional
- An Audio Interface
- A Clean Power Source
- Reading Technology: iPad/Tablet
- Wireless Keyboard/Mouse
That already seems like an intimidating list. I’m here to help! I am also not going to hold back, there really is a lot of information to know about each piece of equipment/software. There are wonderful resources out there, but you might want to bookmark this one–it’s going to have absolutely everything you need to get started.
As a fun note, if you didn’t have any of the above and you decided to purchase everything, you could spend easily spend over $1000 on all the equipment. Don’t worry, I’ll give you some options if you want to make this cheaper.
Does your Voice Audio get louder and softer in your recording? Consider using a compressor! Learn more about compression in our guide, here.
Noise-Free Environment: Finding Or Creating
One of the difficulties around recording any type of audio is that you only want to capture the audio of the thing you’re trying to record. In other words, you don’t want to record the dog barking, the cars driving, or the AC running in the background, you only want to record the voice!
The key is to record in an environment that deadens the sound–that means eliminates echos or external noise from seeping into the recording.
This isn’t true for all types of recording, sometimes you want to record some of those echos of the room, but for recording talking (audiobooks in particular), the generally preferred style right now is to have the sound as “dead” as possible, meaning no background noise whatsoever.
You may think that you need a recording studio for this to work. This is partially true, but it doesn’t necessarily have to look like how you are imagining.
Since soundproofing is a huge topic in itself–I’ll just cover some basic options, here. Let’s go from most expensive to cheapest.
Building Your Own Recording Studio
If you are serious about recording voice then you need a dedicated room. In a recording studio, every aspect of the room is soundproofed–that means thick (i.e. heavy) doors that form strong seals, noiseless air conditioning treatments, soundproofing your outlets, foam walls, air gaps, etc.
For example, if you wanted to see what kind of modifications you can make to a room to truly make it soundproof, check out a soundproofing resource reseller here.
This is by far the most expensive option. Total soundproofing is an extensive project that shouldn’t be entered into lightly. If you want to record one or two books or projects, this is not going to be worth it. It’d be far more economical to rent out an existing recording studio.
I want to emphasize, this is probably not the correct solution for you. Most people can get by with soundproofing treatment, and not a total soundproof makeover. See the treatment section, below.
Renting An Existing Recording Studio
If you want a room that already has the sound treatment and the equipment you want (that’s right, you don’t have to buy a microphone or a computer, even), then you can rent your own recording studio. Studiotime is a company that rents out recording studios (often you can pay extra if you’d like a sound engineer to help out with the process).
The price is often by the hour, so if you have a ~500 page book at around 80,000 words, that will make somewhere around a 10 hour audiobook. You can plan on it taking twice as long to record as it does to just listen to the finished product, so you will need around 20 hours of studio time. More if you have never done it before.
So, at a studio price of $40 an hour, that means you’ll spend around $800 to record one 10 hour book. That doesn’t include the cost of editing, which is an extensive and time-consuming process.
However, if you have only one or two books that you want to record, then it’s still cheaper than to professionally soundproof your own room.
DIY Sound Treatment
Here’s the deal, for the most part, people don’t expect perfection in everything. It’s okay if there’s a slight bit of noise–many times people download audiobooks without their full fidelity. Sometimes people have the privilege of downloading audiobook in perfect HD quality, but many times the recording is old, or it’s been compressed for faster downloading, etc.
In short, you can often get by with some sound treatment rather than a full soundproofed room.
Let’s talk about some options:
Acoustic panels
Acoustic panels won’t prevent sound from entering into your makeshift studio, but what they will do is help prevent your room from having as much echo (called reverb in the biz).
Here are professional grade acoustic panels from gikacoustics.
One very economical DIY way to add some sound absorption is to make your own acoustic panels:
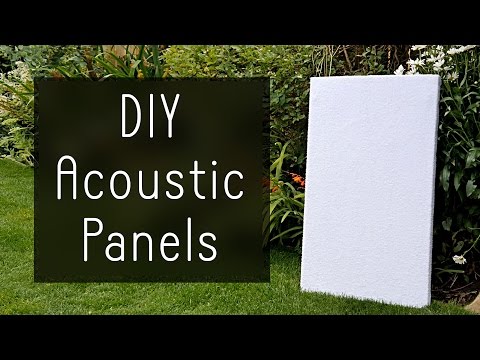
Although it takes more effort, this guy found his treatment was more effective than professional grade acoustic foam.
If you want to try the least expensive acoustic foam that looks nice (but won’t be as effective) so you don’t have to worry about it, that’s also here on Amazon.
Decorate (rugs and wall hangings)!
It sound silly, but if you recall when you moved into the room you are in right now, and there was no furniture, that the room had tons of reverb. Most non-hard surfaces (like rugs, office chairs, books) are going to absorb the sound a little bit. Even just having furniture will diffuse the sound even if it doesn’t absorb it, per se.
Diffusing sound is a popular technique in some studios to not kill the sound completely, but allow it to resonate in a pleasing way.
If you want to kill two birds with one stone–if you decorate your walls and floors (the more absorbent the better) you’ll be able to make your room better suited to recording voice. Wall quilts or rugs are a fantastic option.
If you have a lot of outside noise, you can use heavy curtains (or just hang up a blanket) over the window. It won’t prevent sound from coming in, but it will help.
Hang Up Blankets (DIY)
You know when you were a kid and you would build a fort with kitchen chairs, blankets and couch cushions?
It’s time to bring that creativity back and channel your inner child! This is a super economical way to make a makeshift studio. Try to create a little room with walls made out of heavy blankets, and this is a fantastic and easy way to get your sound to be cleaner while recording.
Buy Your Own Portable Studio
Many people want to record, and there are some amazingly easy solutions to make it more accessible. Check out these options:
Studio-In-A-Box (Vocal Booth)
If you are on the go, or if you don’t want soundproofing to take over your life, you can use a studio-in-a-box!
The simplicity of this solution is very exciting. Rather than a lot of time and money trying to soundproof an entire room, you can just absorb the sound of your voice. Check out the concept in this video:
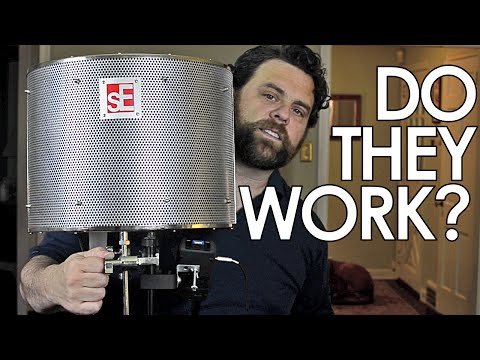
You can see the voice booth he uses here on Amazon. I was so impressed with how well it cancelled out the reverb when I saw this!
Move To The Closet
I know this sounds kind of silly–but believe it or not, you have a lot of great soundproofing material in your closet already. This is the lowest budget option (that or making a recording booth fort from hanging blankets), but can work perfectly well for many projects.
Pop Filter: Removing the Pop From Your Talk
This is separate from the rest of the noise-free environment discussion because it is that important.
A “Pop-Filter” is a device to prevent “plosives” which are the non-vocal-fold-produced sounds that we make every day like “T”, or “S”, or “P”, and so on. These little plosives are quick outbursts of air which really sound awful in a recording. Even though many microphones come with a built-in “pop filter”, you really should get a separate pop filter made for the process.

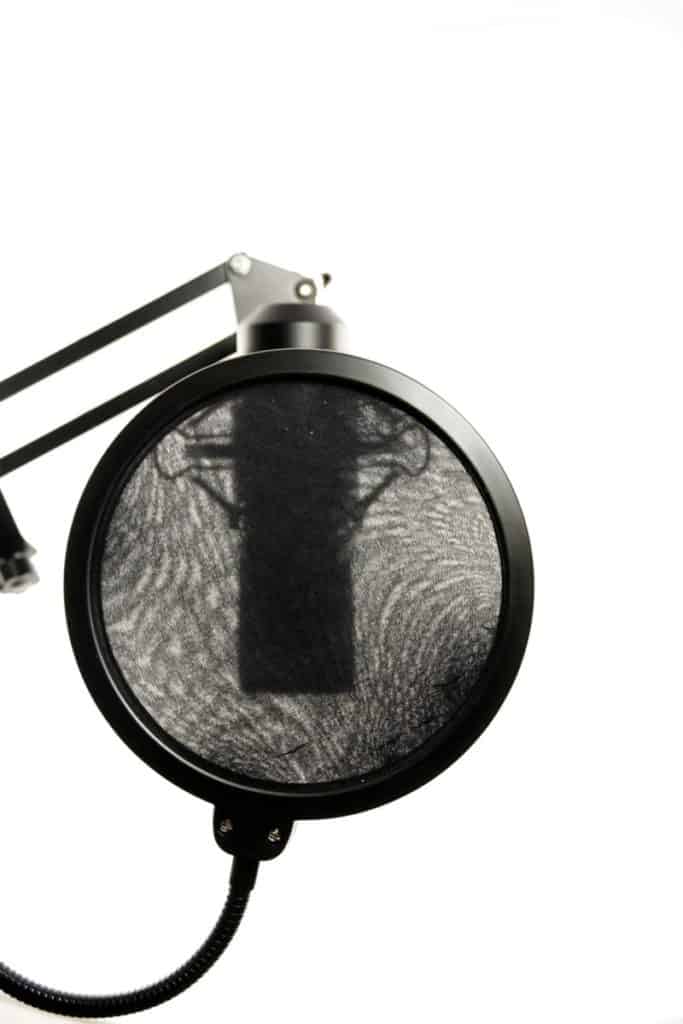
Fortunately, these aren’t overly expensive. Here’s one that’s not a bad price from Shure (on Amazon) (a big name in the recording industry). There are plenty of cheaper ones… I’m sure the one I got is from a company that doesn’t exist anymore—but here is one that is popular currently (also Amazon)
Alternatives To a Pop-Filter
No beans about it, you need something to prevent those plosives–but you may not have to go buy a pop filter. Your microphone may have come with a fluffy cover, which could work for your purposes–you’ll have to demo it yourself, though to find if it’s acceptable in the recording. It might not be a bad idea to ask someone else’s opinion on a demo recording before going too far with it, though.
If you’d like to know all the different types of windscreen styles for microphones, check out my article here (and you’ll finally learn what a “dead cat” is)
Microphone: Capturing Your Voice
The microphone is the heart and soul of the recording process. Admittedly it needs other components to get this to work, but this is assuredly a critical component.
Now, there are hundreds of different types of microphones. Not only are there different brand names with varying levels of quality, but there are even different microphone designs that work fundamentally differently. Some mics are good for some purposes, and some are better for others.
Now, if you’re like most people, you don’t want to become an audio engineer, you just want to record an audiobook or other project!
That’s fine–I’ll try and keep things brief, but there are some important terminologies that are super important to know and understand.
Dynamic vs. Condenser: Which One is Better?
A dynamic mic is a low-power mic, and it’s designed to be positioned directly in your face. For example, you don’t want to be more than 6 inches (perhaps even closer) from the SM-58 (here on Amazon) mic (an extremely versatile and popular mic from Shure).
A condenser mic is a more sensitive microphone that requires phantom power (can be provided through USB or through an audio interface) that is better-suited to picking up an environment (on stage recordings sometimes have condenser mics that are pointed at the stage just to add richness to the recording).
From my own personal experience, I would use a condenser mic for recording an audiobook or a long voice track. Condenser microphones are less finicky on the exact distance you are to the mic, while a dynamic mic is very particular about being the perfect distance. Since you’re going to be recording talking for a long, long time, it’s best, in my opinion, to find a mic that is comfortable to speak in.
Furthermore, in my experience, it’s easier to get the sound levels you want. Often you have the problem with condenser mics of being too loud, but it’s easier to go quieter–and this also helps with noise problems. You are essentially drowning out any background noise with your own voice. I’ve experienced with dynamic mics that despite my best effort, recording something quiet or nuanced is more difficult without noise.
TL;DR —Go with a condenser mic for recording an audiobook or other long talking project.
XLR vs. USB: Which One Is Better?
The audio engineer world and the normal person world hasn’t fully merged yet. There are still thousands of options, many requiring more gear than you might be planning for.
I’ll be quick in summarizing:
XLR microphones = more gear, with greater flexibility (perhaps cheaper microphone)
USB microphones = less gear, less flexibility, potentially more expensive because of more built-in components.
I mentioned how it might be cheaper to get an XLR microphone–while that may be true, you will lose all that money saved by all the additional gear you have to purchase (audio interface and cables). Furthermore, there are some very affordable USB microphones that aren’t “studio quality” but do fine for most people.
USB Microphones
A USB microphone has a preamp (amplifies the signal coming from the microphone) built-in to the microphone. This preamp is often powered via the USB connection to a computer.
This simplifies your life quite a bit. You don’t need to get a separate device for recording with a USB microphone. Most likely, it will even come with the cables you need.
If you are just getting started and don’t want to buy a ton of equipment, a USB mic is the way to go.
I’ll reiterate: If you only want to record a couple books or podcast, you should get a USB microphone instead of an XLR microphone.
There are, frankly, not as many options as other connection types (I’m looking at you, XLR!), but more and more microphones are releasing with USB capability.
What if you have a new Macbook Pro?
It’s true, that most USB microphones go to the larger square USB (called USB-A) than the smaller USB-C on certain Macbook Pros. If this is your scenario, you can easily convert from USB-A to USB-C with an adapter from Apple like this one (Amazon). This will allow you to connect any USB-A microphone to your Macbook.
Best USB Microphone For Making Your Own Audiobooks
I’ll tell you right now, it’s impossible for me to tell you which is the best because there are so many variables when it comes to recording. The most important being the recording environment, but there are dozens of other factors. You might have a mic that doesn’t pick up your particular furnace rumble and one that seems to only pick up your furnace rumble and nothing else.
However, I can still simplify your life and show you an excellent choice.
The Blue Yeti (Amazon) is one of the most popular USB microphones, and after studying the features and listening to the sound quality, it’s for good reason! It’s a solid microphone that’s really affordable for the level of quality–not only that, it’s versatile, as it has settings to support conversation in a conference room with many people, as well as the cardioid recording pattern, which just means it is ideal for recording a single subject (like your reader!)
It’s not the cheapest microphone out there, but hear me out–audiobooks and even podcasts have a certain expectation of quality. The Blue Yeti has good quality for its price and features, and is versatile and comfortable enough for recording an audiobook.
What do I mean by comfortable? Well, since it’s a condenser mic and has enough power in its electronics, you don’t have to put your face 2 inches away from the microphone for it to capture a good sound. You can put the mic at a comfortable speaking distance, and that is really important for long recording sessions.
It comes with all the electronics you need to get started. This means you don’t need an audio interface or XLR cables–you just plug it into your USB port on your computer. It even supports Chromebook (and your smartphone), which is a big plus if you don’t have another type of computer.
If you are just getting started and you want to get recording an audiobook or start podcasting and you want decent sound without all the fuss, then go with the Blue Yeti.
Now, why even think about other microphones? The quality of a Blue Yeti is good–but it’s not the highest quality–there are definitely other microphones that will sound cleaner and have less noise (that hiss that you can hear if you turn a recording up real loud). Does it matter? It depends–for a lot of projects, the highest quality isn’t necessary–but if you’re wanting to get into professional level recordings, you may need to think about getting an XLR microphone.
XLR Microphones
XLR refers to the connection type of the microphone. It’s a 3 pronged connection that has been around for decades.
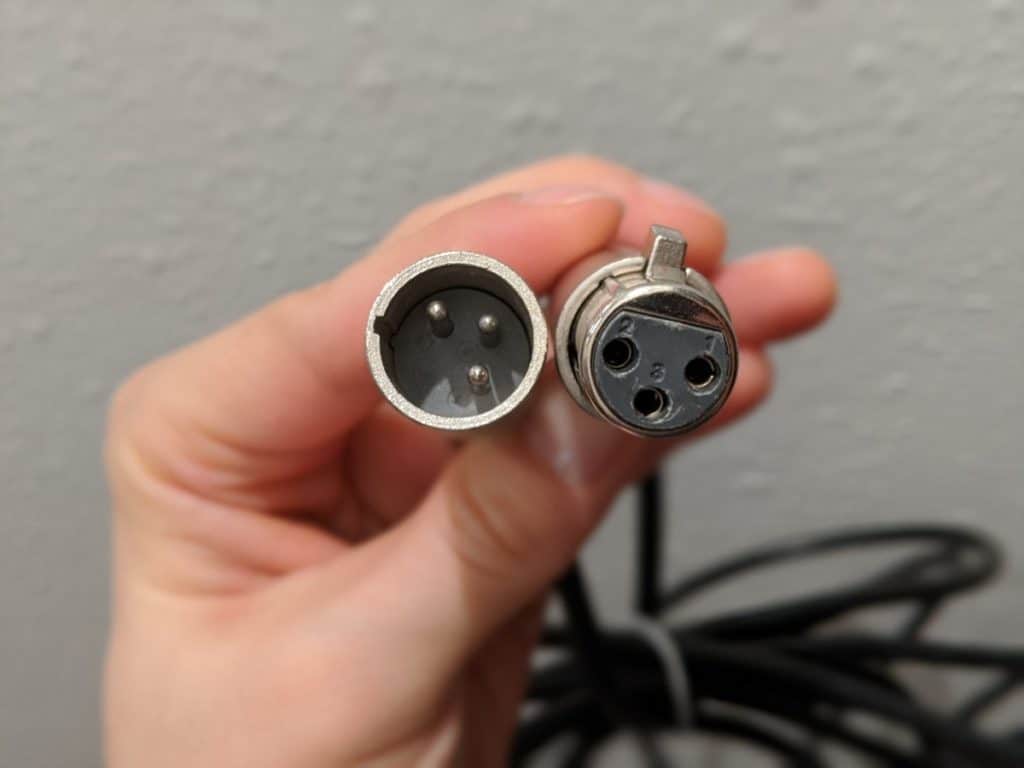
XLR microphones are specialized for audio equipment–you won’t find USB mics in most professional studios–instead you will find microphones connected with XLR. The reason for this is all the equipment that audio engineers use to modify and capture the sound is standardized to use XLR.
If you want the highest quality microphones, you should look for microphones with XLR connections.
If you get an XLR microphone, you will need a way to connect it to your computer–for starters the easiest way to do this is with an audio interface, discussed below.
Best XLR Microphone For Making Your Own Audiobooks
Again, best is subjective, and the premium XLR microphones can be well over a $1000–however, there are some great microphones for under $500.
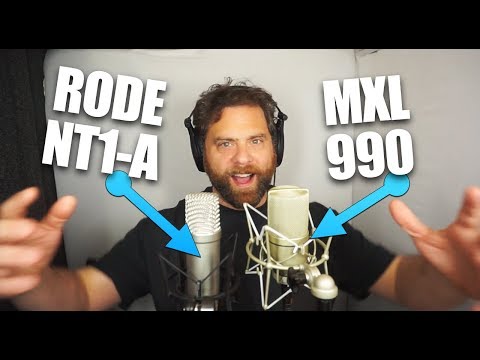
I thought the Rode NT1-A (Sweetwater Sound) sounded the most impressive, but the MXL 990 also sounded really good (Amazon) and is quite a bit less expensive.
Honestly, when you embark on a journey and are just getting your equipment, I am always of the opinion to not get the best of the best, but let your talent and skill grow with your gear. The MXL 990 is a great option because it is so affordable and sounds really nice. I have a MXL v88 and I’ve been very satisfied with the build quality, so I can easily recommend the 990 after listening to some comparisons.
I watched and listened to this comparison here between these two heavy hitters if you want to listen to the sound quality yourself to see what you think:
Cables: Untangling the Mess
Electronics need cables. It’s so unfortunate, but true. I’ll run down the cables that you need for USB mics or for XLR microphones.
What Cables You Need For USB Mics
- Microphone USB Cable (Often your USB Mic will come with this). This is sometimes a USB Micro, or USB Mini cable, or even simply USB-B to USB-A
- If you have a new Macbook Pro (with only USB-C ports), a USB-C to USB-A adapter (such as you see here on Amazon)
That’s it! No more cables necessary that what are necessary to run your computer.
Optional: I will say that since it’s a USB cable, the length of the cable might not be very long, you might find it better to get some distance between you and the computer so you don’t record your computer fan, and so a USB cable extender might come in handy (like this one on Amazon). –I should give the caveat though that longer cables means more potential for noise. Make sure the cable is shielded.
What Cables You Need For XLR Mics
XLR Mics need the following cables:
- An XLR Cable from your microphone to your audio interface or mixer
- A power cable from your audio interface to the wall. Some audio interfaces are USB-powered, so you may not need an additional power cable.
- (Same as above) A USB Cable from the audio interface to your computer… see the above list for USB mics for more details on what those might be
- (Same as above) An adapter from USB-A to USB-C if you are on a newer Macbook Pro with only USB-C ports
The cable situation isn’t too much more complex, but you now have another device in the chain–the audio interface or mixer.
Microphone Stand
Whatever the situation, you will need a type of microphone stand to suspend your microphone. Microphone stands are important because, critically, they separate the microphone from the ground or your desk. This prevents rumble from getting into your recording.
Shockmounts
Shockmounts are those funky things that surround condenser microphones that remind me of spiders. They are intended to prevent vibration from impacting the recording. Most condenser mics will come with the shockmount so you don’t have to worry about it.
Desk Stands
Simple desk microphone stands have a tendency to pick up the rumble of whatever they are standing on. Unless the desk mic stand has some sort of system to prevent this (insulated feet), this is something to be aware of.
Floor Stands
Floor mic stands have the best flexibility, as they can be used standing or sitting, or even record things that are near the floor. It takes a few minutes to get used to how to adjust them, but are easy enough to use once you get the hang of them. I have a Proline mic stand (Musician’s Friend)and it is my favorite out of all the stands I have–it’s the most solid feeling and all the adjustment hardware is still solid from the years I’ve owned it.
Computer
You have to have a computer or a personal recorder to record your audio.
The computer is going to process the sound coming in from your microphone and is going to capture it to its hard drive. Most computers will do just fine in this regard, but your life will be a lot better if you have certain specifications.
Mac vs. PC
Macs or PCs will work great for recording–neither is better than the other for this purpose. With PCs, there is a bigger variance in hardware so you have to know a bit more to make sure you get one that supports what you want.
Even if you have an 8-year old Macbook, this still should be plenty fine to support any kind of recording that you want to do. Anything older you might run into other issues that makes it more difficult to deal with.
What Are the Minimum Stats
Since truly, an 8-year old Macbook will do just fine, these stats are mostly for PC users.
- Processor: Intel Core 2 Duo Minimum, Intel I3 recommended
- Memory: 4GB is the minimum, but 6GB is recommended
- Hard Disk: You can get by with a 256 GB hard drive, but if you are doing a lot of projects, you are really going to want at least a 512 GB hard drive.
These are my own minimums that I think would be enough for a tolerable recording experience, but if you meet the minimum requirements from Audacity (the leading free recording software), you should be good–but the closer you are to those minimum requirements the less fun it will be.
Now, I’m a computer guy– I say these are the minimums… but if you have a 5-year old PC, chances are it will do just fine– if you didn’t get it at the bottom-bottom-bottom-end of the line. It doesn’t take much to record a single track of audio.
If you want to anything more complicated than one track recording, then a stronger computer will make recording a more pleasant experience. I have an old Core 2 Duo computer that I tested recording with, recently, and it was fine–it got the job done, but it wasn’t pleasant to work with. So feel free to spoil yourself on a decent computer from $500-800. It will definitely be sufficient as long as it has USB ports.
Can I Use a Chromebook To Record an Audiobook?
Yes! It turns out you can hook up a Blue Yeti to a chromebook and use an online system to record audio (such as this app from 123Apps). Most popular USB mics should work just fine provided the chromebook has built-in drivers to support the microphone.
You can also record audio directly to the internal storage of the Chromebook–just look for audio recording apps for the Chromebook.
If you are willing to do some technical work, here is a video for recording and editing audio on a Chromebook with Audacity:
Personal Recorder
Another option I wanted to mention is to use a personal recording device, such as the Zoom H4n–these devices have decent microphones in and of themselves, and they are solid state devices, meaning you don’t have to worry about fans or clicking hard drives or anything like that. If you don’t have a computer or like the idea of recording directly to a device without a computer, you might check these out.
USB mics won’t work on these types of devices, though. Some of them have XLR inputs so you should be able to plug a microphone directly into the device!
Recording Software: The Brains
Without recording software, it’s difficult to get anywhere. Fortunately for us, we have Audacity.
Audacity is free, open-source software that is multi-platform. You can find it for Mac, you can find it for Windows, and Linux, and in a number of other surprising places.
It’s hard to improve on its capabilities for the price point… really there is nothing better for recording. There are tons of features, but it’s still simple enough to start recording.
If you are on a Mac, you do have Garageband, which I don’t count as free because you had to buy a Mac to get it. However, Garageband is also great software that can be used for recording audio. It however can do a lot more, so you may find Audacity’s simple recording-only interface a bit easier to deal with.
An Audio Interface
Alright, so if you are using an XLR mic, you will need an audio interface. The audio interface is essentially a way to interface XLR microphones or 1/4 inch jack instruments (guitars and keyboards) with a computer.
The audio interface connects via USB (some with Firewire… although less often, now) to your computer.
The audio interface very often has a pre-amp which amplifies the signal coming from the microphone. This pre-amp has a knob to control the amount of amplification. This is a very critical component as you need to adjust the microphone to the proper levels that are neither too quiet or too loud.
Everybody seems to recommend the Focusrite Scarlett (this is the single input version on Amazon) interface. I haven’t used it myself, I have a couple really old interfaces that I’ve had for a while, both that you can’t find anymore. Anyway, the Focusrite will do just fine for your needs.
You do not need an audio interface if you are getting a USB mic.
Making Yourself Sound Better In Post
Besides getting the right mic gain down during your recording, there are things you can do to make your voice sound nice and even without jumping up and down in volume too much. The secret is in audio compression. Now this is another topic all in itself–in fact, I made a huge guide about compression here to help you get familiar with the terminology and numbers.
If you want a no-nonsense solution to boosting the volume of your recording while simultaneously making sure that your voice doesn’t clip or get over-boosted, try looking at a Limiter. Be careful about being too aggressive as it can make your voice sound mechanical and unnatural. Trust me, though. Any professional recording studio will be using compression to make your voice come out great.
Clean Power
This is where things get tricky. If you are recording and you find yourself struggling with an electrical hum in your sound, there are number of reasons that could be causing this. I’ll give you a couple tips of things to look out for.
The first thing is that you may be recording too quiet. Either the pre-amp gain is too soft or you are too far away from the mic. The closer you are to the mic, the louder the sound will be. Most importantly, the louder the sound, the more difficult it will be to hear noise in the recording.
The trick is to find the balance. You want to get your sound to around a max of -6db. You should never have your voice red-lining (often audio interfaces will have something that will flash red if you are too loud) as this means your voice will come across as staticy and unpleasant to listen to.
If you’re too quiet, the listener will have to crank the volume, and they will be able to hear the noise of the recording a lot more.
Your mic quality has a lot to do with this as well. Despite your best efforts you may not be able to get rid of the noise.
Now, that’s just tips to reduce noise–if you are experiencing electrical noise in your recording, then you may have power problems.
Getting Rid of Electrical Noise
You may have another device on the circuit (you know when you trip a breaker and a few outlets and lights turn off? That’s a circuit) that’s causing electrical noise. Try other outlets on other circuits to see if you get a different result.
High power devices like dryers and microwaves can feasibly interfere with your recording due to Electromagnetic Interference. Or you could have a ground loop, which could potentially be fixed if you plug all the components into a single outlet (using a surge protector).
It could be just that the wiring in your home is not done well or the power in the area has quality issues. There’s not a ton you can do to fix all those problems, but there are some options.
Cleaning the Power Yourself
You do have options, though if you happen to have power that is not clean–you can use simple options, like ferrite cores that you can snap onto your USB cable (the one connecting your microphone or your audio interface), to more complex, which is to use a power conditioner (an example of a less expensive one on Amazon), which there are many, many different types.
I’d opt for trying different cables, different outlets, (and if you can, a different house) and basically everything you can before resorting to cleaning your own power.
Reading Technology
This is optional, but if you are recording voice, it makes it a lot easier to have quiet technology for reading what needs to be recorded. The good ol’ iPad (Amazon) is a great option for many as it will allow you to read the material and turn the pages without having to hear the crinkle of pages.
Wireless Keyboard
If you are recording on your computer and you are trying to eliminate noise in your recording by being far away from the recording controls, it’s kind of annoying to have to get up and walk over to the computer to start and stop the recording.
I found that an easy way to get around this is to use a wireless keyboard mouse combo. We have the Logitech K400 (Amazon) and I have found it awesome for that purpose. These things change all the time so you may have to poke around for a newer model by the time you read this article.